
In this article we will explain you about how to make a Minecraft water elevator. One intriguing creation within the game is the water elevator, a functional and aesthetically pleasing way to move between different levels in your builds. In this guide of how to make a Minecraft water elevator, we’ll walk you through the step-by-step process of crafting your own Minecraft water elevator.
Related: How to Get a Saddle in Minecraft
How to Make a Minecraft Water Elevator
-
Materials Needed
-
Glass Blocks
-
Signs
-
Water Source
-
Soul Sand
-
Magma Blocks
-
-
Planning Your Elevator
-
Selecting the Location
-
Determining Height
-
-
Creating the Shaft
-
Digging the Shaft
-
Adding Glass Walls
-
-
Installing Water Sources
-
Placing Water Blocks
-
Utilizing Signs
-
-
Adding the Elevator Mechanism
-
Soul Sand and Magma Blocks
-
Understanding Bubble Columns
-
-
Testing and Adjustments
-
Floating Mechanism Check
-
Adjusting Water Levels
-
-
Finishing Touches
-
Aesthetic Additions
-
Lighting and Decor
-
-
Troubleshooting Common Issues
-
Water Flow Problems
-
Alignment Issues
-
-
Efficiency and Speed
-
Maximizing Elevator Performance
-
Redstone Enhancements (Optional)
-
Materials Needed
To construct a Minecraft water elevator, gather the following materials:
- Glass Blocks: These will form the main structure of your elevator in how to make a Minecraft water elevator, allowing you to see through it as you ascend or descend.
- Signs: You’ll need signs to create water pockets within the elevator, ensuring that the water flows correctly.
- Water Source: Make sure you have a nearby water source, as you’ll need it to create the bubble columns.
- Soul Sand: This unique block creates updrafts in water, essential for the elevator’s functionality.
- Magma Blocks: Magma blocks create a downward flow in how to make a Minecraft water elevator, allowing for the descent in the elevator.
Planning Your Elevator
Selecting the Location
Choose a strategic location for your water elevator. It’s best to pick a spot where you have easy access to both the upper and lower levels of your build. You can also figure out about Dye Leather Armor from here.
Determining Height
Decide how many levels your elevator will span. This will influence the height of the shaft you’ll need to dig.
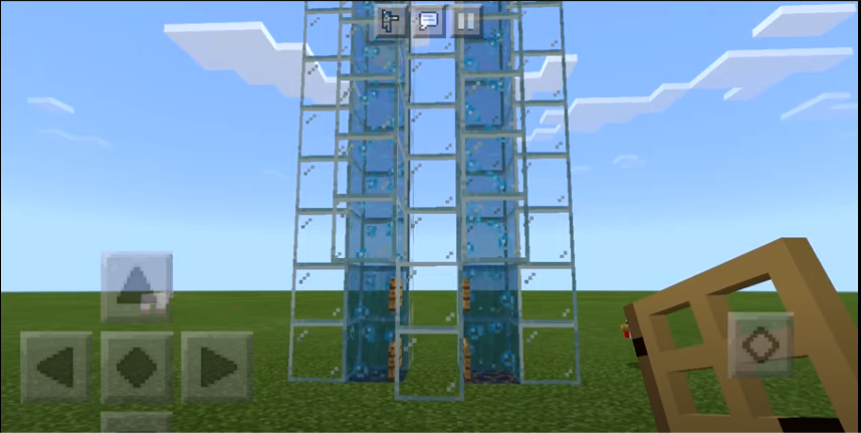
Creating the Shaft
Digging the Shaft
Using your preferred mining tool, dig a vertical shaft from the top level to the bottom level of your build.
Adding Glass Walls
Line the inside of the shaft with glass blocks. This not only provides structural integrity but also allows for a clear view of the surroundings.
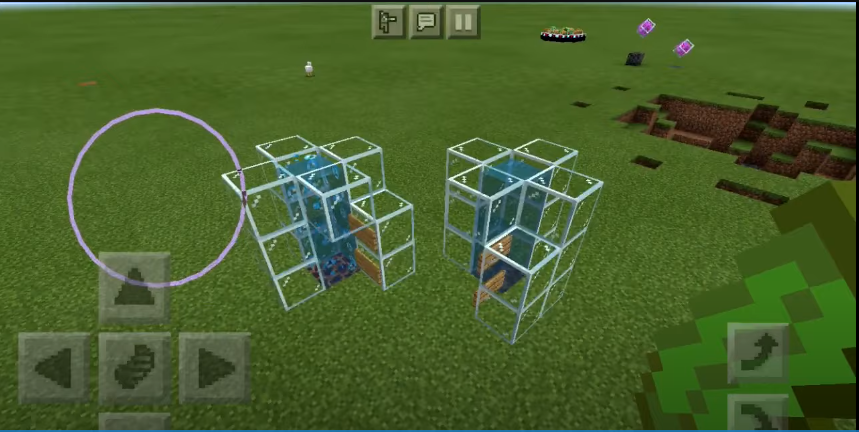
Installing Water Sources
Placing Water Blocks
Position water source blocks at the bottom of your shaft. These will serve as the foundation for your elevator’s functionality.
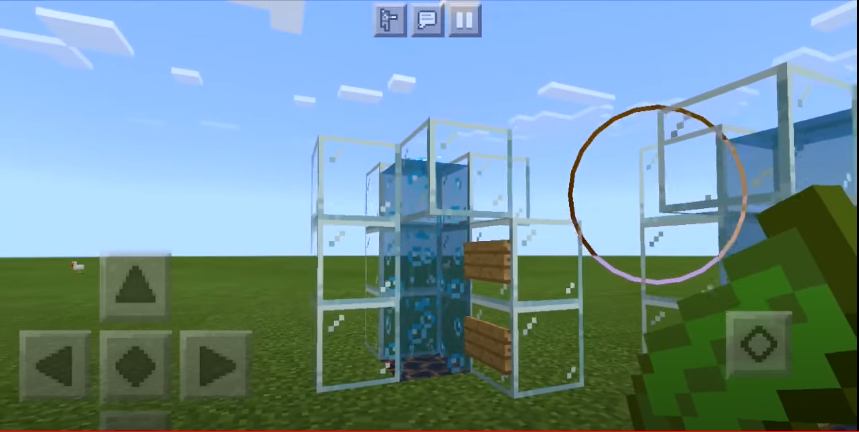
Utilizing Signs
Place signs strategically inside the shaft to create water pockets. This will ensure that the water flows correctly, enabling smooth travel.